CBO-500
22½″ W × 26½″ D
A compact place to start.
This oven’s size
17″ wide opening
1 × 12″ pizza illustrated
1 × 13″ × 18″ baking pan · outside rim
1 × 12″ skillet · 18″ including handles
Compare oven sizes
This oven uses the CBO-500 hearth. Compare the three sizes below; available formats and fuel options vary by size.
Dimension-based illustrations · Same scale and viewing angle across all three sizes
22½″ W × 26½″ D
A compact place to start.
This oven’s size
17″ wide opening
1 × 12″ pizza illustrated
1 × 13″ × 18″ baking pan · outside rim
1 × 12″ skillet · 18″ including handles
28″ W × 38¼″ D
More room to gather.
17″ wide opening
2 × 12″ pizzas illustrated
1 × 13″ × 18″ baking pan · outside rim
2 × 12″ skillets · 18″ including handles
39″ W × 53″ D
Room for a bigger menu.
21″ wide opening
4 × 12″ pizzas illustrated
2 × 13″ × 18″ baking pans · outside rim
4 × 12″ skillets · 18″ including handles

Performance & construction
How your oven cooks
The low dome and vent draw flame across the dome and down the side — CBO’s FlameRoll™. Radiant heat, convection and conduction work together throughout the oven.
Convection
Air drawn through the opening heats inside the oven, moves toward the back and rises, then flows toward the flue. This continuous circulation carries heat through the cooking chamber.
Radiant heat
The fire and heat stored in the dome, walls and hearth radiate energy throughout the chamber. That retained heat keeps working as the oven cools.
Conduction
The hot hearth transfers heat directly to food or cookware in contact with it. Preheated cookware can then pass that heat directly to the food.
Illustrations show wood-fired cooking principles. Oven size and fuel equipment vary by model.
Picture the possibilities
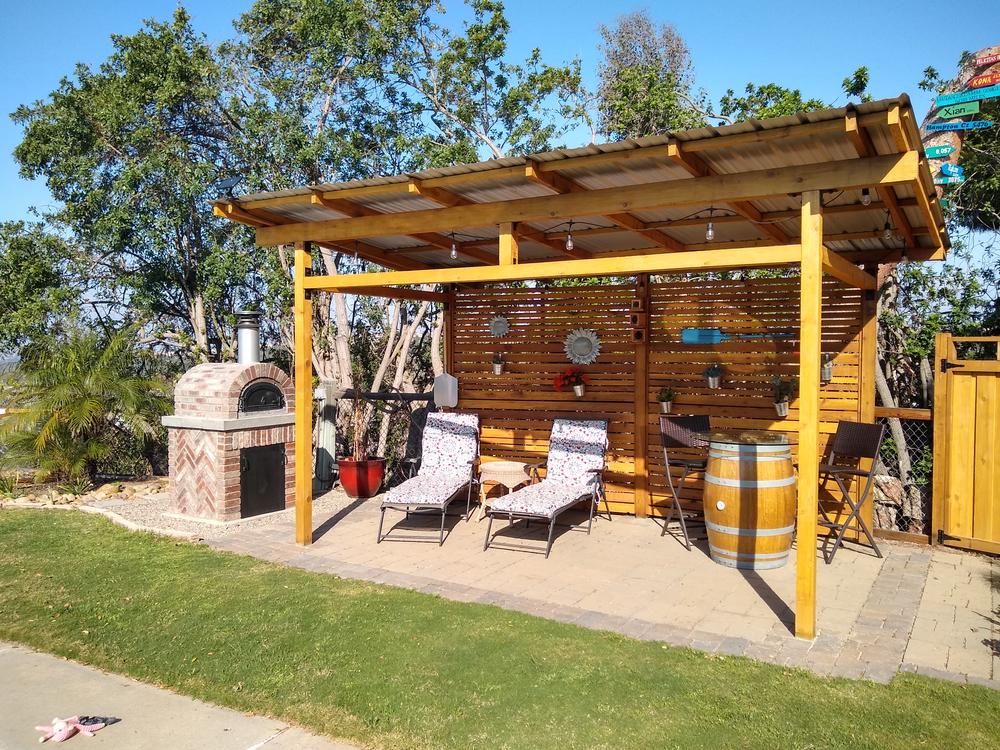
A place to cook, gather and stay a little longer. Explore the possibilities of brick-oven cooking.

From the CBO kitchen
See how a chef brings a menu to life with Chicago Brick Oven.
A CBO cooking demonstration. Installation and equipment shown may differ from your selection.
With your oven
Oven components, installation materials and cooking tools, organized around the package for this model.
The supporting structure, enclosure finishes and installation labor. Plan any utility connections and additional venting components with your installer.
Before the first fire
Start with the dimensions and the manual for your selected oven. Review the complete installation requirements with your qualified installer before building the supporting structure.
Use the current wood-fired oven manual to plan the supporting structure, ventilation and clearances for your installation. Review the model-specific drawings with your qualified installer.
This model is wood-fired. Follow the manual’s curing, fuel and firing instructions before your first cook.
Cooking surface is specific to the oven model. Consult the current manual for overall dimensions, support requirements and clearances.
PDFWood-fired oven manualOpen the current manual PDFProduct specification sheetOpen the specification sheetA few finishing touches
Review the package contents above, then choose any additional tools and accessories for your setup.
Owner experience
Explore reviews for this oven, then visit Fan Mail for more stories from the Chicago Brick Oven community.
I made over 30 pizzas for a graduation party the first time I used this pizza oven (after a small test run a few days prior). Once up to 700 degrees (surface temperature), this unit will hold its heat amazingly well. I bake a pizza, shut the door with the vent hole closed, prep another dough with ingredients, and put this one in the oven. The prep takes about 5 minutes in between pizzas, while the baking takes about 4. I have finished one in 2 minutes, but I find that I am fighting to keep my deep edge from wanting to burn. Instead, I back the pizza out towards the opening and take a bit more time. This allows for a more thoroughly crispy crust underneath and a slightly browned molten cheese on top. About every other pizza, I add 1 or 2 thin pieces of wood on top of the coals in the back. The coals do most of the work, but you need a small flame roll to properly finish the top. A couple of general tips: Make sure to rub a little flour on the bottom of the dough before placing it on the square peel. If you flour the peel to heavily, the flour will end up on the baking surface of the oven and will transfer to other pizzas to make a rancid flavor. Also, buy a round stainless peel to do the turning. You can turn with the square one that comes with the kit, but a small round one will be much easier to use. Finally, after the last pizza, spread the coals out evenly over the whole baking surface, close the door and shut the vent hole. This will help clean the oven for next time. When you are ready to bake again, sweep out the ashes and you are ready to build another fire.
 United States
Tom picked up the pizza oven a week ago. He has not started the installation as of yet.
United StatesIt’s still in the box. Waiting for mason to build it into a big outdoor kitchen
Our oven has been a BIG hit with family and friends. We have been cooking up a storm over here! Not only is the pizza fantastic, so are some of our favorites like Sausage and Peppers and Soft Shell Crab! Thanks for a great product!
I absolutely love my CBO! It has become the centerpiece to my Backyard Kitchen. The best part� I can now cook my Famous Neapolitan Tomato and Sausage Pie in my CBO instead of a conventional oven. And, the CBO team was with me throughout the entire installation process! Great customer service guys. -Mike C.
A few more details
A little planning makes room for years of cooking. Our team can help you work through the details.
Ask our teamReview the current manual for your oven model, including the supporting structure, venting and clearances. A qualified installer can help you confirm the requirements for your planned location before you build.
Read the installation manualRead the current wood-fired oven manual and follow its curing, fuel and firing instructions. Complete the installation checks before starting the oven.
The kit provides the oven components listed in the package section. Plan the supporting structure, enclosure, finishes and installation around the dimensions and requirements in the current manual.
See what is includedThe Package Includes section shows the cooking tools supplied with your selected oven. Review that list before adding accessories to your order.
See what is includedContact our team for current availability and lead time for your selected configuration, and to discuss delivery arrangements for your project.
Ask our teamShare the current manual and model-specific drawings with your installer before planning the support, clearances, fuel supply and ventilation. The installation section brings the available resources together.
Plan your installation Read the installation manualYour next gathering starts here
Choose the details that fit your space, or let our team help you plan the next step.