
 Call Us


Before you start making delicious pizzas at home, it’s essential to cure your pizza oven properly. Whether you own a brick oven or a wood-fired model, curing removes internal moisture, strengthens the structure, and ensures long-term durability. This guide explains the complete process, helping beginners cure their oven safely and confidently.
If you’re exploring different oven types, our guide on the Top 9 Best Pizza Ovens for Cooking Enthusiasts will help you choose the best model for your cooking needs. Understanding the features of modern brick and wood-fired ovens also makes the curing process easier for beginners. This ensures you not only pick the right oven but also prepare it correctly for long-term use.
What Is Pizza Oven Curing?
Pizza oven curing is the gradual heating process that allows moisture trapped inside the oven walls to evaporate slowly.
This prevents cracks, improves heat retention, and prepares your oven for high-temperature cooking.
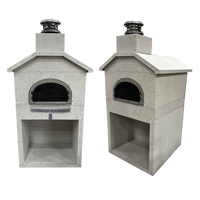
Several homeowners follow this method while curing a brick pizza oven or curing a wood-fired pizza oven for the first time.
Why Curing Is Important
- Prevents structural cracks
- Enhances heat distribution
- Improves cooking performance
- Extends the oven’s lifespan
- Prepares the oven for temperatures above 800°F
Skipping proper pizza oven curing can damage the oven permanently, making this step extremely important for every new owner.
Step-by-Step: How to Cure Your Pizza Oven
1. Clean and Inspect the Oven
Remove dust, debris, or leftover construction material.
Check for visible cracks or loose bricks before you begin.
2. Start With a Small, Low Fire
Use kindling and build a small fire.
This curing process should be conducted at a temperature between 250°F-350°F ( 100°C) (do not exceed this temperature) for a period of six hours on two consecutive days.
3. Maintain Proper Ventilation
Keep the chimney or vents open to allow moisture to escape.
Good airflow ensures safer and more effective pizza oven curing.
4. Watch for Steam and Condensation
Moisture escaping from the oven’s dome or floor is normal.
You’ll see it reduce over time as curing progresses.
5. Perform Final High-Heat Firing
On the last day, burn a full, strong fire.
Let the oven reach standard cooking temperatures to complete the curing process.
Pro Tips for a Perfect Cure
- Use only dry hardwood for a clean burn
- Avoid rushing the process, curing takes 2-3 days
- Track temperature
- Don’t overload the oven with wood
-
Small hairline cracks are normal during drying
Common Questions About Pizza Oven Curing
1. How long does it take to cure a pizza oven?
Typically 2-3 days, depending on size and material.
2. Can I skip the curing process?
No. Skipping curing can lead to cracks, heat loss, and structural issues.
3. What wood should I use?
Dry, seasoned hardwood is best for curing a wood-fired pizza oven.
4. Do all pizza ovens need curing?
Most brick and refractory ovens do. Some modern stainless-steel ovens may arrive pre-cured.
Final Thoughts
Curing your pizza oven is a crucial first step toward creating authentic pizzas with the perfect crust and flavor. A well-cured oven heats evenly, lasts longer, and is safer to operate. Follow the steps slowly and patiently, and you’ll have a fully prepared oven ready for high-heat cooking.


